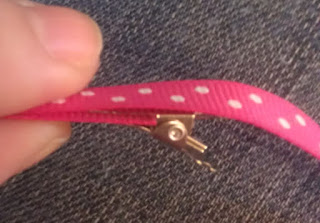
I found Strawberry Shortcake ribbon and Strawberry Shortcake bottle caps on www.etsy.com. And a tutorial on how to do them. I used more hot glue than anything else but I think they turned out pretty cute!
Supplies needed:
Small alligator hair clip (as seen above)
Thin 1/4" wide ribbon
Hot glue gun
Steps:
1. Measure 6 3/4" of thin ribbon and cut
2. Stick the ribbon in the clip.
3. Put a line of glue from the tip to tip on the top of the clip.
4. Fold the ribbon over the top of the clip. Hold for a moment.
5. Put a dot of glue on the other side of the squeezy part of the clip and wrap the ribbon around the top of the clip and firmly press it to the glue.
6. Open the clip and put another line of glue along the bottom side of the clip.
7. Wrap the ribbon around the lower prong of the clip and around to the back.
8. Press closed and hold for a moment.
That part is done!
Now, there are a few other embellishments you can add other than a bow.
This one is very simple. I bought strawberry buttons and used rhinestone stickers for it.
Just hot glue them on. (Note: the hotter the glue, the better the stick)
This is the typical bow clip.
Materials Needed:
Covered alligator clip
Ribbon 1" wide or wider.
Hot Glue gun
1/4" ribbon
needle
thread (color doesn't matter - you won't be able to see it)
Steps:
1. Cut thicker ribbon to 6"
2. Loop around and have ends overlap one another.
3. Fold flat and place two stitches in the very center of the ribbon.
4. Accordion fold the center. For the 1" wide ribbon, I only did 3 folds. You can do more for wider ribbon.
5. Wrap thin ribbon around the center and tie in the back. Cut excess. (For an extra hold, I add a dot of glue as well.)
6. Glue the bow to the top of the covered clip.
7. You can either be done with what you have or add a little embellishment in the center of the bow.
The last one I know how to do is this one:
Supplies needed:
covered alligator clip
Hot glue gun
thin ribbon - 1/4" - as many colors as you'd like.
Steps:
1. cut ribbon about 5" or 6"
(Do this 4 times)
2. Attach ends to one another and put dot of hot glue to secure it into a circle. Then glue the middle.
3. Glue center of the ribbon onto the middle of the clip.
4. Do this with each ribbon. First making a + sign and then giving it a* look.
5. Add a embellishment in the center if you'd like.
And you're done!
Hope this was helpful. I definitely thought bow making was much harder than it is. Of course, the more complicated ones are I'm sure.


No comments:
Post a Comment